Showing posts with label lunch box. Show all posts

27 Jul 2016

PANEER PALAK FRANKIE ROLLS

Hello everyone

Serving nutritious, healthy cum delicious food to their family is every homemakers dream. And this dream becomes more challenging when you have fussy eaters at your home, just like mine. My younger one demand more attention , when I have to prepare lunch box for him. He is too picky to like regular meals, so I have to invent new forms of daily meals to lure him. Today I added some spinach and paneer to kids lunch box in some innovative way without telling them. Who doesn't know the nutritional values of green leafy veggies , which our kids totally deny. Generally kids are fond of paneer dishes, so I took advantage of this weakness of them and added some more nutrition in my way. Hope you will find it more interesting way to feed your child some more nutrients without more fuss. 
Recipe is given below, do try and see your kids having healthy snacks in delicious way.

PANEER PALAK FRANKIE ROLLS


Serves: 5-6
Time: 30 mins 

Ingredients 

For filling:

1 1/2 cup cottage cheese ( paneer), cubed
big onion, thinly sliced
1 cup spinach , roughly chopped 
2-3 green chilies
1/2 tsp ginger garlic paste
Pinch of turmeric powder 
1/4 tsp cumin powder
1/4 tsp garam masala powder
1/4 tsp chaat masala powder
1/2 tsp lemon juice ( optional)
Salt to taste
Oil

For rolls:

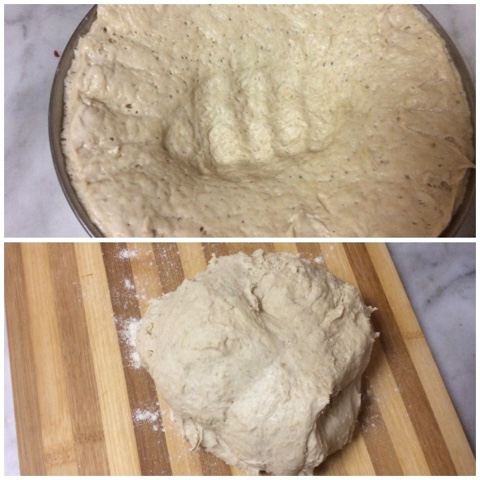
5-6 tortilla wraps/ round parathas/ khubus ( I used parathas made of dough kneaded with left over dal)
Some salad
Sauce of your choice

Method:

First of all make smooth paste of spinach, green chilies and some water. Keep aside for later use. 
Heat some oil in a wok and add sliced onions. Let it cook till transparent, add ginger garlic paste and saute for a minute. Now add cumin powder, garam masala powder, turmeric powder and salt. Saute for 2 minutes then add prepared puree of spinach. Cook for 4-5 minutes and add chaat masala powder. Add paneer cubes and saute for 2 mins. Adjust salt and our filling is ready. 


Now either prepare round paratha or take ready made wraps and put required amount of above filling , topped with some salad and sauce. Roll it to give cylindrical shape and wrap in an aluminum foil if giving in lunch box , to retain its shape and softness.


 Or cut it in desired size and serve hot with any sauce or as it it. I used khubus this time.


*You can add other vegetables too as per your choice and availability.


* Paneer can also be replaced with any other veggie option or meat products as per your choice.


It is very delicious cum healthy breakfast/ tiffin snacks provides maximum nutrition in one go, and is very easy to prepare too.


 You can also prepare it for dinner/lunch/breakfast or whenever you want  as it is a complete meal and filling too.
Hope you all will definitely give it a try and don't forget to share your experience with me. 

Happy cooking....


21 Jul 2016

PLAIN TAWA KULCHA

Hello everyone

Who don't like kulchas, whether stuffed or plain , these are one of the favorite breakfast in North Indian houses. But it is a bit different from regular parathas as it's more softer and fluffier than those. That's why kids prefer it over parathas.Though my younger one is very picky eater so to feed him different veggies I have to exercise my mind ,a lot. This time I thought to make these kulchas and serve with their favorite combo and viola it was a hit, as my lil pie finished his lunch box. You can prepare it with any filling of your choice . But this time I made simple plain kulcha and served with panjabi chhole.
Recipe is given below , hope you all will love to try it. 


PLAIN TAWA KULCHA


Serves: 5-6
Time: 30 mins ( leaving kneading and resting time)


Ingredients 


4 cup chapatti flour/ all purpose flour ( as per your choice ), 
1 tsp active dry yeast
1/2 cup Luke warm water
2 tsp sugar
1 1/2 cup warm milk
1/2tsp salt
2 tbsp oil
Butter/ ghee for cooking kulcha


Method: 

For dough:


First of all add yeast in 1/2 cup Luke warm water and 2 tsp sugar, mix them lightly and leave for 5-10 min or till it become nice frothy.


Combine everything together , knead for 5 mins and let it rest for 7-8 mins. Again knead for another 5-6 mins to get nice soft dough. Initially it may seems to be too sticky but after kneading for long you will get nice non sticky soft dough.

* This resting and kneading process is important to produce gluten in dough to get nice soft and fluffy kulchas, so don't skip it.


* Knead the dough by pulling and stretching it instead of applying too much pressure on your dough


 Grease the dough with oil and keep it covered at warm place to rise, at least 2-3 hr or till it doubles in volume, depend on weather. 


When it become double in volume then punch the dough and again knead for 2 mins .


Again keep it for second rise for 1/2-1 hr. If you are not going to make it soon then, better to keep the dough in refrigerator for slow rise . But keep the dough out side refrigerator atleast 1 hr before making kulcha to get your dough at room temp.


For kulcha:

Take a tennis ball size of dough and flatten it . Now roll it in nice thick round / oblong shape using rolling pin and some dry flour. 

* You can also make flavored kulchas by sprinkling some nigella, sesame seeds, crushed garlic and coriander leaves all over it on one side. Now again roll lightly to stick sprinkles on it.

** If you are good at making round shape of kulcha with hand then it's best , just go for it. But I am not so good at this so used my rolling pin.

Now place it on a preheated tawa and cover with lid.


Now cook it on medium to low flame till you see it's upper side getting nice dry and bubbles on it. 

Now flip it and apply some butter or ghee all over it as we do with paratha. 

Cook till it get nice golden patches on it both sides. Keep flipping in between to get both sides cooked evenly. 


Similarly make all kulchas. 


Your soft, fluffy and delicious kulchas are ready to serve with any side dish of your choice. 


You can serve it for breakfast, dinner or even in lunch box too. 


You can also prepare it stuffed and serve with any side dish of your choice. 


*Stuffing can also be done according to your choice and availability.

* You can also make it in oven. Bake for 10-12 mins at 200degree C or till you get desired golden colour on it.


This is so yummy to resist. Hope you and your family will definitely love this delicious treat , so make it and do share your experience with me .

Please pour your valuable comments and suggestions here, they meant a lot.

Happy cooking....

4 Jul 2016

SEMI DRY POTATO CAPSICUM FRY

Hello everyone 

Today I am having a very delicious yet so easy to prepare side dish. Some times we don't have much options to try but potato is one veggie, you can have for your rescue anytime. And best thing is, nearly everyone love to relish on this king of veggies. Potato have a unique quality to get merge with any other veggie without complain☺️. And it's this quality makes is most eligible for every mix and match. As today, I was not having much options in my hand so thought to give capsicum and potato a chance . And luckily they made their marriage a huge successful one😁. Everyone loved this combo. Super easy and delicious side dish got ready in minutes and got finished even much faster. You can prepare it for your lunch box too, just awesome with poori/paratha/naan or pulao.

Stepwise recipe is given below, hope you all will love this combo, too. Do try and let me know how's it turned out for you☺️

SEMI DRY POTATO CAPSICUM FRY


Serves: 3-4
Time: 30 mins

Ingredients 

3 -4 medium potatoes, peeled and cubed
2 medium onions, cubed
1 1/2 cup colored capsicum, cubed
1 medium onion, thinly sliced
2-3 green chilies, slitted
2 medium tomatoes, roughly chopped
1/2 tsp ginger garlic paste
1 bay leaf
1/4 tsp asafetida ( heeng)
1/2 tsp cumin seeds
1/4 tsp turmeric powder
1/4 tsp black pepper powder
1/4 tsp garam masala powder
1 tsp Kashmiri red chili powder 
1 tsp chicken/ curry masala powder
1 tsp kasoori methi, crushed between palms
Salt to taste
Oil


Method:

Heat some oil in a wok, add asafetida , cumin seeds and bay leaf. Let cumin crackle, add sliced onions  and green chilies. Saute till golden, now add ginger garlic paste and Saute for a minute. 
Now add cubed potatoes and onions, fry for 3-4 mins and cover to cook till potatoes are half done.


 Now add all dry masala powders , some salt and Saute for a minute or till spices get nice aromatic and fried. Fry on minimum flame to avoid burning it. 


Now add chopped tomatoes and capsicum, mix well and cover to cook till tomatoes get nicely cooked and mushy. 

Check for doneness of potatoes, if not done then cover again till potatoes also get tender. Now adjust salt and add kasoori methi. Mix well and switch off the flame. 


Garnish with chopped coriander leaves and serve hot with paratha/ poori/naan or pulao. 


Your super simple yet tempting semi dry side dish is ready to please everyone. 


You can prepare it as one of your side dish in your home parties also or pack with poori/paratha in kids tiffin or in your lunch box. 


* You can add little water before adding kasoori methi and simmer for 2 mins , if feel your veggies are too dry.


Hope you all will definitely try this simple yet delicious kids friendly recipe and don't forget to share your feedback with me. Please pour your comments and suggestions in comments box below, they meant a lot.

Happy cooking....

28 Jun 2016

MIX VEGGIES AND SPINACH OATS SEEKH KABAB

Hello everyone

Till now you all might be come to know that I am a pity mother of lil fussy eater 😃. He doesn't like any veggies, But he loves to eat tikkis and kababs . So to feed him some veggies I use to make different types of kababs using different mix and match of veggies . This time tried to add some spinach to make iron rich and tempting looking kababs for him. Not only him but we all enjoyed every bite of it. Used capsicum, beans, carrots, potato and some oats to make these beauties. These are pan fried in very less oil , which makes it suitable snacks for weight watchers too. But i am so happy that my lil one loved it and relished it without fuss.
Recipe is given below, hope to make you happy with its superb taste.

MIX VEGGIES AND SPINACH OATS SEEKH KABAB


Serves: 5-6
Time: 30 mins( leaving the chilling time)

Ingredients 

1 1/2 cup very finely chopped mixed veggies ( beans , carrots, colored capsicum) , I used chopper to chop the veggies
1 cup spinach,finely chopped
3-4 medium size potatoes, boiled and mashed
2 big onions, finely chopped
3-4 green chilies, finely chopped
1/2 cup oats, slightly dry roasted
1/4 cup green coriander leaves, finely chopped( optional)
tsp ginger garlic paste
1/2 tsp black pepper powder
1/2 tsp cumin powder
1/4 tsp turmeric powder 
1/4 tsp garam masala powder
1/2-1 tsp chaat masala powder
Salt to taste
Oil

Method: 

Heat some oil in a wok, add chopped onions and chilies. Let them fry till golden, now add ginger garlic paste and saute for 2 mins. 

Now add chopped mixed veggies and some salt, saute for 4-5 mins. Add all dry spice powder except chaat masala . Saute for 2-3 mins and add spinach ,cover to cook the veggies till tender. 

Add mashed potatoes and oats,again saute for 2-3 minutes. Now add  chaat masala and adjust salt. 

Finally add coriander leaves and mix well. Switch off the flame and your mixture for Kabab is ready. Let it chill in fridge for 1 hr. 


Now make desired shape of kabab from mixture . I took orange size ball of mixture and placed on a skewer as shown in pic.to make seekh kababs. If you are not comfortable in doing so then can simply make flattened disc shape .


shallow fry on a non stick tawa till nice golden on all sides. 


Your nice tender and delicious kabab is ready to be served with any chutney or sauce. I served with mint dip.


*You can use any veggies of your choice,  I used whatever was available.

*You can adjust spices as per your taste.


*You can prepare its mixture prior and keep in fridge. Just prepare kabab when have guests at home or can make it for kids tiffin . 


These are not only delicious but healthy too, as full of iron and fibers . Enjoy your day with yummy and healthy snacks. You can use these kababs as patties for your buns too.


Hope you all will love this easy cum healthy delicious recipe. Please pour your valuable comments and suggestions here, they meant a lot.

Happy cooking....

16 Jun 2016

INSTANT WHITE KHATTA DHOKLA

Hello everyone

Every mom have tension of what to give in her kids tiffin so that they will finish without nakhre. And the problem worsen when your kid is a fussy eater like mine. My daughter used to finish her tiffin most of the time but my lil one always have excuses for leaving his snacks. So I always have to try new things for him, which can attract him to eat. Today when I asked my kids what they want to carry in their lunch box then my daughter said dhokla , as she is die hard fan of khamans. But the problem is these bean khamans get soggy till they eat. So tried to make some different version of it . As I had rice flour in hand  so tried instant khatta dhokla. As it resemble much to idlis , so my lil fussy one also gave green signal for this one. This dish is not unknown to maximum of you but still sharing mine version to help those moms, who are looking for interesting , healthy and quick tiffin ideas for their fussy eaters.
Recipe is given below , hope you all will try it.

INSTANT WHITE KHATTA DHOKLA


Serves: 4-5
Time: 40 mins( leaving resting time)

Ingredients 

1 cup semolina ( rawa or sooji)
1 cup rice flour
1 cup yogurt ( curd)
Water as per need
1/4 tsp salt ( as per taste)
1 green chili, finely chopped ( optional)
1/2 tsp ginger garlic paste
1/2 tsp citric acid or lemon salt
Baking soda or eno

For tempering:

2 tsp oil
1/4 tsp asafetida ( heeng)
1/2 tsp cumin seeds
1/2 tsp mustard seeds
1/2 tsp sesame seeds
2-3 spring fresh curry leaves
2-3 green chilies, slitted


Method:

First of all mix semolina, rice flour ,yogurt, salt and required water to make a lump less idli like batter. Let it rest for 1 hr or overnight at any cool place , if planning to prepare early morning.

* But never keep in refrigerator other wise semolina will not absorb liquid.

* for quick result use hot water to make batter and let it sit for 1/2 an hour.

If after soaking,you find your batter thicker than regular idli batter then add little water at a time and correct the consistency. Now add ginger garlic paste and chilies. Mix well, your batter is ready to be used. 

Make your steamer ready by heating 1 cup of water in a wide vessel with stand in base. You vessel should be wide enough to hold your mold easily.

Now separate required batter in another bowl, which can be used to fill your mold at a time. Now add two to three pinches of baking soda or 3/4 spoon eno powder and 1/4 tsp citric acid to separated batter. Give a quick stir you will see nice frothy batter , don't over mix the batter otherwise all the air bubbles formed ,will vanish and result in hard dhokla.

Now fill the mold immediately with required batter and either steam as regular for 15-20 minutes by putting your mold in steamer with lids closed or microwave for 5-6 minutes, depend on size of mold and microwave power.

Check for doneness by inserting a knife or skewer in middle of dhokla, if it comes out clean then done, other wise cook for some more minutes.

I used my heart shaped cake mold to steam these. So did in two batches. Make sure to grease your mold generously and fill your mold only half. As it will rise on steaming.

 Let it rest for 2-3 minutes then demold. Now cut desired shapes with knife. Similarly make the other batches too.

Now heat oil in tempering pan, add asafetida,cumin seeds and mustard seeds. Let them crackle then add curry leaves and chilies. Let curry leaves become crisp. Now switch off the flame and add sesame seeds, stir quickly and pour all over the dhokla evenly.


Now your hot tempting dhokla is ready to serve with tomato coriander chutney or any sauce of your choice.


*  You can add any veggies too, of your choice.

* After adding soda or eno , use the batter immediately. That's why add soda or eno in batches of batter, when needed.


* For more soft dhokla , use eno instead of baking soda. But baking soda also works well.

* Instead of citric acid you can also use lemon juice, but citric acid gives more fluffier result .


* If you are making dhokla in microwave then keep a bowl with some water along with the microwave safe mold, to get nice moist dhokla.

* Use nice sour yogurt for khatta dhokla or add some lemon juice to get sourness of your choice.


* While using microwave, keep an eye on it as over doing may result in dry and hard dhokla.

If you don't have silicon mold just use your regular mold and prepare these healthy and delicious tiffin snacks for your kids. 


Hope you all will like this easy , quick and kids friendly recipe and will definitely give it a try. Please pour your valuable comments and suggestions here, they meant a lot.

Happy cooking...


1 Jun 2016

WHOLE WHEAT FLOUR NO YEAST INSTANT KULCHA

Hello everyone

Who don't like kulchas, whether stuffed or plain , these are one of the favorite breakfast in North Indian houses. But it is a bit different from regular parathas as it's more softer and fluffier than those. That's why kids prefer it over parathas.Though my younger one is very picky eater so to feed him different veggies I have to exercise my mind ,a lot. This time I thought to make these kulchas and serve with their favorite combo and viola it was a hit, as my lil pie finished his lunch box. You can prepare it with any filling of your choice .Generally kulchas are made with yeast but here I made instant version without yeast, that can be prepared in jiffy too. As in the morning we don't have enough time for proofing of yeast dough so this will be a savior for you and equally yummy and fluffy too. 
Recipe is given below , hope you all will love to try it. 

WHOLE WHEAT FLOUR NO YEAST INSTANT KULCHA


Serves: 3-4
Time: 30 mins

Ingredients 

For dough:

2 1/2 cup whole wheat flour/ chapatti flour/ all purpose flour ( as per your choice )
1 cup thick yogurt ( curd)
1/2 tsp baking soda
1/4 tsp salt
1 tbsp oil

For sprinkling on kulcha:

Nigella ( kalonji) seeds
Sesame ( til) seeds
Chopped coriander leaves

Butter/ ghee for cooking kulcha


Method: 

For dough:

First of all mix all dough ingredients together except yogurt. Now using yogurt knead a soft dough. It may be little sticky but don't worry after resting it will become easy to handle. If needed use little water to get nice soft dough. Don't knead too much just 2-3 minute of kneading is enough . Now cover it and keep it to rest for atleast 10 -15 mins.


For kulcha:

Take a big lemon size of dough and flatten it . Now roll it in nice thick round / oblong shape using rolling pin and some dry flour. Now sprinkle some nigella, sesame seeds and coriander leaves all over it on one side. Now again roll lightly to stick sprinkles to kulcha. 


apply some water on one side of it and place on a preheated tawa with water damped side facing down. It will stick to tawa nicely. 

Now cook it on medium flame till you see it's upper side getting nice dry and bubbles on it. 

Now flip it and apply some butter or ghee all over it as we do with paratha. 

Cook till it get nice golden patches on it. Keep flipping in between to get both sides cooked evenly. 


Similarly make all kulchas. 


Your soft, fluffy and delicious kulchas are ready to serve with any side dish of your choice. 

You can serve it for breakfast, dinner or even in lunch box too. 


You can also prepare it stuffed and serve with any side dish of your choice. 


*Stuffing can also be done according to your choice and availability.


This is so yummy to resist. Hope you and your family will definitely love this delicious treat , so make it and do share your experience with me too. 


Please pour your valuable comments and suggestions here, they meant a lot.

Happy cooking....