Showing posts with label Bread. Show all posts

30 Jul 2016

FOUR DIFFERENT BREADS FROM SAME GARLIC HERB DOUGH AND PANEER ZATAAR FILLING

Hello everyone

I had some thick water drained from my biryani rice and don't want to throw it as was full of aroma and flavour. So thought to bake some bread and use this in kneading my dough as it was long I baked any bread. But then I thought why not to give it some artistic twist and bake some more flavours and designs of bread from this perfect dough. I saw some patterned bread pictures few days back, on Internet . Keeping that in my mind , I tried to make these four types of breads, which are loved by everyone in both taste and look. So here is the technique and tips with step wise pics for baking these cuties. Hope you all will definitely give it a try and come up with your feedback too.

FOUR DIFFERENT BREADS FROM SAME GARLIC HERB DOUGH AND PANEER ZATAAR FILLING


Serves: 3-4 ( each bread)
Time: 1 1/2 hr ( leaving proofing and resting time)

Ingredients

For dough :

4 cup all purpose flour / whole wheat flour/ chapatti flour
1 tsp active dry yeast 
2 tsp sugar
1 tsp salt
1/2 cup warm water
tsp oregano 

2 tsp garlic powder or minced garlic

1/2 tsp thyme leaves(optional)

1/2 tsp rosemary leaves ( optional)
2 -3 tbsp oil 

1 cup warm water to knead dough ( I used drained water from biryani rice)


Milk to brush
Ghee or butter for final brushing 


For filling:

1 cup crumbled cottage cheese ( paneer)
1/2 cup Zataar mix
1/4 tsp oregano
1/4 tsp black pepper powder
1/4 tsp chaat masala powder
Salt to taste

*** You can use any filling of your choice ( potato filling, paneer filling, Nutella filling etc)

Method: 

For dough:


Add sugar in warm water and then mix yeast in it and let it rest for 10-15 mins or till it become frothy.


Add salt, garlic powder or garlic, oregano, thyme , rosemary leaves and oil in flour and knead with yeast and warm water till it become soft, shiny and nonsticky dough. 

It may seem very sticky at the beginning but will become manageable after 6-7 mins of kneading. 

It will take 8 to 10 mins or even more ,to get perfect dough . apply some oil on it and cover with damp cloth, let it rest for 2 -3 hrs in a warm place like in closed microwave/oven or till it doubles it volume. 

Now punch the dough, again knead for 4-5 mins and cut in four equal parts.


Till then mix all the filling ingredients together . Keep aside for later use.


Cut the dough in four equal parts for four breads.

**** While making one bread , keep rest of dough covered.


SUNFLOWER BREAD:


First of all take 1 part dough and cut it in two equal size dough. Roll a little thick chapatti from it , place it on a baking tray lined with butter paper and spread paneer zataar filling on it evenly , leaving edges. 

Press it firmly to stick on the dough.Now make another thick chapatti from another part of dough and place it over filling, covering it fully. 

Now press the edges to seal. Using a big round bowl you can cut it to get perfect round shape flower.


 Now Place a small round cookie cutter or bowl at the center and make cuts on the dough as shown in pic.
Now twist each cut part as shown . Sprinkle some sesame seeds all over it and cover . Place at some warm place for second rise for at least 30 - 40 mins . 


Till then prepare for another bread.
Now brush it with some milk and bake for 15-20 mins at 220 degree C in a preheated oven or till desired colour it acquired. 


Remove from oven and brush some butter or ghee to get nice shiny finish and soft bread for long time.


Enjoy warm with hot cup of tea or coffee.


You can prepare this for any b'day party or in evening snacks or for kids tiffin too, they will love to relish on these beautiful paneer filled breads.


ROSE BREAD:


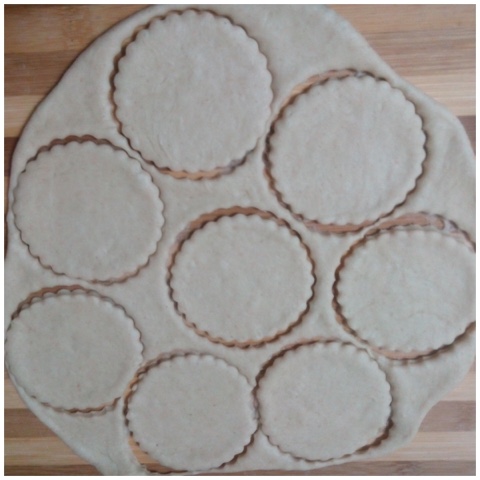
Now take 1 part of dough and cut it in gooseberry size small doughs. Take one dough and roll it to round chapatti and using a 3-4 inch diameter cookie cutter or bowl, cut round shape. Now make four equal size cuts on it as shown in pic. 


Place 1 tsp filling at the center and fold cuts as shown in pic. Your rose shape is ready. Place it on a baking tray lined with butter paper. Similarly make all the roses and sprinkle some sesame seeds on it.


*** Always keep prepared roses at some distance during second rise ,to avoid sticking on rising and baking. Otherwise it will ruin the shape of roses.

Now cover it and let it rest for 30-40 mins at a warm place. Now brush it with milk and bake at 220C for 15 -20 mins or till desired colour is acquired.


Remove from oven and brush with some ghee or butter.


 Now let it out and cool on a wire rack.


 Your savory yummy rose bread is ready to be served with a cup of tea or coffee. 


Kids will also enjoy it with some sauce . You can prepare it for your kitty party or for tiffin snacks too.


STAR BREAD:


Take 1 part of the dough and cut in two equal halves. Roll one part to a thick round chapatti , place on a baking tray lined with butter paper and spread filling on it evenly, leaving edges. Press it firmly to stick on dough. Now roll another half of dough to thick round chapatti of same size and place on filling, covering it completely. Press the edges to seal. Now place a small round cookie cutter or bowl at the center and make cuts as shown in pic.
Now hold two cut strips in both hands and twist them in opposite directions. Now stick their edges together. Similarly do with all the strips. Sprinkle some sesame seeds on it.


Now cover it and let it rest for 30-40 mins. Then brush it with milk and bake it at 220 degreeC for 15 -20 mins.


Remove from oven and brush with some butter or ghee.


 Now let it cool on a wire rack and your star bread is ready to be served to your kids.


Enjoy this lovely bread with your tea or coffee..


BRAIDED BREAD:


Take the last piece of dough and any left over from other doughs, cut in four equal parts. Now roll each dough in long ropes. 

Now tuck one end of each rope together and make braid as shown in pic. Place on a baking tray lined with butter paper. Sprinkle some sesame seed all over it. 

*** If you are not comfortable with four rope then go with three. And make braid as we do with hair.


Now cover it and let it rest for 30-40 mins then brush it with some milk and bake at 220 degree C in a preheated oven for 15-20 mins or till it become nice golden.


Now remove from oven and brush it with some ghee or butter.


Let it cool completely on a wire rack before slicing, to get neat slices.


Your yummy garlic herbed slices are ready to be served with butter or to be toasted.


Enjoy with hot tea or coffee.


**** Never divide bread dough by stretching,other wise the gluten formed during kneading will damage, just use knife or dough cutter to cut dough in pieces.


So bake these cuties and please your kids and family with your creativity. I tried to explain all the tips and tricks but if any thing left then please let me know by dropping down your queries and suggestions in comment box below. Your comments and suggestions meant a lot.

Happy cooking....

14 Apr 2016

THREE BREADS FROM SAME PAV DOUGH ( NUTELLA FLOWER BREAD, ZATAAR BREAD, BUNNY BUNS)

Hello everyone

After baking perfect pav for my pav bhaji, I thought why not to give it some artistic twist and bake some more flavours and designs of bread from this perfect dough. I saw some patterned bread pictures few days back, on Internet . Keeping that in my mind , I tried to make these three types of breads, which are loved by everyone in both taste and look. So here is the technique and tips with step wise pics for baking these cuties. Hope you all will definitely give it a try and come up with your feedback too.

THREE TYPES OF BREADS FROM SAME PAV DOUGH


Serves: 3-4 ( each bread)
Time: 1 hr ( leaving proofing and resting time)

Ingredients

Pav dough 

Milk to brush


NUTELLA FLOWER BREAD:


First of all cut orange size dough from well risen and again well kneaded dough. Roll a little thick chapatti from it and cut rounds from it using cookie cutter or any sharp edge glass or bowl. 


Now take one round and spread some Nutella on it as shown in pic. Now half fold it and again fold to quarter as shown in pic. Now seal its edges from one end only , as in pic .


 Now place it on a round baking dish lined with parchment paper or greased well. Similarly make all the petal shapes with Nutella and arrange as shown in pic. 


Now cover it and place at some warm place for 30-40 mins. Till then it will rise again and fill the gaps between different petals. Now brush it with some milk and bake at 200 degree C in a preheated oven for 15 mins. 


If it does not get nice golden in colour in 15 minutes then increase the oven temperature to 230 degree C and bake it further for 3-5 mins or till it get nice golden in colour. Take it out and let it cool on a wire rack.


 Your super delicious as well as eye candy is ready to serve. 


You can prepare this for any b'day party or in evening snacks or for kids tiffin too, they will love to relish on these beautiful chocolate filled breads.


ZATAAR BREAD:


Divide the remaining dough in two equal parts. Now take one dough and roll it to a rectangular little thick chapatti of your baking tray length . Spread Zataar mix on it evenly as shown in pic. Now roll it to a tight log shape. 


Now place it with sealed side down , in the baking tray lined with parchment paper or greased well. Cut the dough in 1/2 -1 cm thin slices as shown in pic. Now arrange the alternate slices as shown in pic. 


Now cover it and let it rest for 30-40 mins at a warm place. Now brush it with milk and bake at 200degree C for 15 mins. 


To make it more golden increase the temperature to 230degreeC and bake further for 2-3 mins or till get desired colour. Now let it out and cool on a wire rack.


 Your savory yummy bread is ready to be served with a cup of tea or coffee. 


Kids will also enjoy it with some sauce . You can prepare it for your kitty party or for tiffin snacks too.


BUNNY CUM PIGGY BUNS:


Divide the rest of dough in small lemon size pieces and give them oval shape using your palm. Now place then as some distance , on baking tray lined with parchment paper or greased well. 

**Always keep some distance between each buns as they will expand twice , otherwise they will stick to each other will rising or baking and ruin their shape. As some of mine got stuck to each other.

Now cover it and let it rest for 20 mins. Now make ears of it using kitchen scissors and eyes by skewer or tooth pic as shown in pic. Now again let it rest for 5 mins. Then brush it with milk and bake it at 200 degreeC for 15 mins.


 To get more golden colour again increase temperature to 230 degreeC and bake for 2-3 mins. Now let it cool on a wire rack and your cutie bunny or piggy , whatever comes out😃😃 is ready to be served to your kids.


 You can also make these buns, stuffed with Nutella, potato filling, paneer filling or any filling of your choice. I made then plain as it was my first trial but will soon share its stuffed version too. Till then serve it with bhaji, Nutella, sauce or as it is. My younger one loves plain buns more. 


**** Never divide bread dough by stretching,other wise the gluten formed during kneading will damage, just use knife to cut dough in pieces.


So bake these cuties and please your kids and family with your creativity. I tried to explain all the tips and tricks but if any thing left then please let me know by dropping down your queries and suggestions in comment box below. Your comments and suggestions meant a lot.

Happy cooking....

12 Apr 2016

SOFT AND FLUFFY PAV ( FROM CHAPATTI FLOUR)

Hello everyone

Pav is one of the most common bread used in many delicious street foods in India,like  vada pav, pav bhaji , dabeli etc. Generally we purchase pav from market whenever plan to make any of these street foods at home. But have you ever tried baking your own pav at home? No , then try this simple recipe of perfectly soft and fluffy pav at home and I bet , you will never buy these from market from that day onwards. The aroma of freshly baked pav will enhance your craving for these foods. I also used chapatti flour to make these instead of apf , which makes it more eligible to try at home recipe. Chapatti flour has intermediate texture of apf and whole wheat flour, so I prefer it for all my baking experiments and results are always awesome. You can use any flour as per your preference and availability. Hope you will definitely give it a try and come up with your feedback too.
Stepwise recipe is given below, do try ☺️.

SOFT AND FLUFFY PAV ( FROM CHAPATTI FLOUR)


Serves: 3-4
Time: 40 mins ( excluding proofing and rising time)

Ingredients 

4 + 1/3 cup all purpose flour or chapatti flour
1 cup warm milk/ water
1/4 tsp yeast ( for quick rise use 2tsp)
3 tbsp sugar
1/2 cup Luke warm water+milk ( 50:50)
1 /2 tsp salt
2 tbsp oil or butter

Method: 

First of all add 1 tbsp sugar to 1/2 cup water+milk, now add yeast and stir gently. Keep it at warm place for 10-15 mins or till it become nice frothy.
Now take 4 cup flour , butter/ oil , salt, remaining sugar, milk and yeast mixture. Mix it to a sticky dough. 


Now knead the dough for 5-7 mins, if you find it more sticky even after kneading then add remaining flour , little at a time. Generally dough become less sticky after kneading some more. Now let it rest for 5-7 mins and then again knead for 4-5 mins. Till then your dough will become nice bouncy and non sticky. Now apply some oil all over the dough and cover it. Place the dough at some warm place like inside your oven or microwave. 


Let it rise for 4-6 hrs if you used 1/4 tsp yeast and 2-3 hrs if used 2 tsp yeast. It must become double  the initial volume, so give sufficient time to rise for perfect pav. 

**Rising time depend on weather too, if you are in colder place then better keep the dough in closed oven or microwave or in tightly tied plastic bag. For warmer places, you can keep on your counter top.


When it rose to double, punch the dough and knead for another 4-5 mins. 


Now cut the dough in equal size balls , nearly 16- 20 regular size pav will be prepared from this much dough. I made small , so got 32 pav. 


 Make nice round balls and place on a greased or butter paper lined baking tray. Arrange all balls at some distance as it will rise again and fill the gap itself. 
Now again cover the tray and place on a warm place for another 1/2-1 hr for second rise.
Give ample time for second rise too, it should almost rise to double for soft pav.


Now brush each pav with milk and bake for 15 mins at 200degree C in a preheated oven. If your pav is not enough golden after 15 mins then increase the temperature to 230 degree C and bake it for another 2-5 mins or till you get your desired color.


Now take it out from oven and brush it with butter to maintain its softness. Let it cool on a wire rack and then enjoy making your favorite street food with these homemade beauties.


** Kneading and resting and again kneading is very important step in gluten formation, so don't skip it to get perfect fluffy pav.

*you can also use water to knead your dough but using milk will enhance the flavour and aroma to many folds.

* For nice buttery flavour use butter instead of oil while kneading.

** Always check your yeast, if it's not getting frothy then discard it and use another yeast.
Water used to dissolve yeast must be Luke warm, neither cold nor hot other wise your yeast will not bloom.
* I don't like too much yeasty smell in my bread so used less yeast and gave more resting time. But if you want to prepare it in less time then use more yeast as suggested.


Keeping these points in mind, just try this recipe , you will never fail. 

Kids love this utterly butterly pav, so you can give this in their tiffin or in evening snacks. You can bake it in advance and serve different types of street foods on demand. 


Hope you will love to try your hands on this bread and please don't forget to share your experience with me. Your valuable comments and suggestions are precious to me, so keep pouring.

Happy cooking....