Bread is a thing which connects us to everyone in this world. Wherever you go, you can find bread in different shapes, sizes, flavours, textures etc but the main thing is it's bread. Today I too have a simple bread recipe to share. It's too simple too prepare but with healthy touch of oats and raisins. It's a must try for health conscious bakers who love to bake for them and their family, healthy stuffs. It's a perfect snacks for tea time or for kids tiffin. So give it a try at least once, you will definitely love it.
Stepwise recipe is given below , hope you all will must try this..
CARDAMOM FLAVORED OATS RAISINS MILK BREAD

Serves: 4-5
Time: 3:30 hrs
Ingredients
3 cup whole wheat or chapatti flour
1/2 cup rolled oats + 1 tsp to sprinkle on bread
1/2 cup milk powder
1/2 cup raisins
1/2 tsp freshly ground green cardamom powder
2 tbsp oil
3/4 tsp dry active yeast
1/2 cup Luke warm water
3/4 cup warm milk
1 tbsp sugar
1/8 tsp salt
Method:
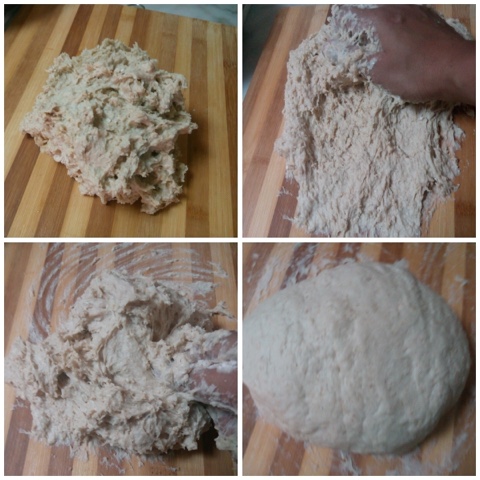
First of all add yeast in 1/2 cup Luke warm water and 1 tsp sugar, mix them lightly and leave for 5-10 min or till it become nice frothy.

Combine everything together , knead for 5 mins and let it rest for 7-8 mins. Again knead for another 5-6 mins to get nice soft dough. This resting and kneading process is important to produce gluten in dough , so don't skip it.

Knead the dough by pulling and stretching it instead of applying too much pressure on your dough.
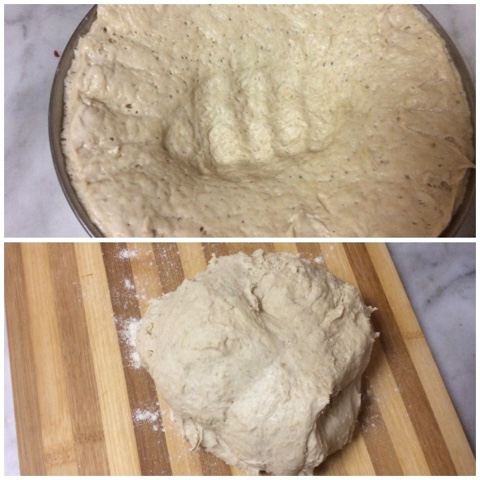
Grease the dough with oil and keep it covered at warm place to rise, at least 1- 2 hr or till it doubles in volume, depend on weather. Give it sufficient time to rise as without it you will end up in dense loaf of bread.

When it become double in volume then punch the dough add cardamom powder and again knead for 4-5 mins .

You can add raisins along with cardamom at this stage instead of adding in dry flour to make your initial kneading process little less tricky.

Now flatten it on a plain surface and by rolling give it shape of a loaf and seal its edges by pinching. Now place it in a greased and dusted loaf pan and apply little oil on it.

Again keep it covered at a warm place for second rise, for at least 45 mins to 1 hr. It must rise almost 1 inch above rims of pan.

Now brush its top with milk.
Now bake it in a preheated oven at 190 degree C for 35 -40 mins or till its top become nice brown and on tapping you can hear hollow sound.

If you see your loaf is browning very fast then cover it loosely with an aluminum foil.

Now brush it with some butter and let it cool completely on a wire rack before slicing, to get nice clean slices.

Your bread is ready to be served with a cup of tea, enjoy these easy yet delicious bread slices. You can also give it in your kids tiffin , either apply butter or jam on it or have it with milk/ tea. In every way these will win your heart.

You can use any dry fruit too and also any other loaf pan to get your desirable shape and flavour. But then baking time may change so after 30 mins keep an eye on it. Mine took exactly 40 mins😊.
While kneading If you find your dough is too sticky to handle then can sprinkle some flour on it , 1 tbsp at a time ,but the quantity given will be sufficient for a soft dough. Adding too much flour can result in dense bread. After kneading it well for 8-10 mins, it will become non sticky it self.

So enjoy these baked delicacies and please pour your valuable comments and suggestions here, they meant a lot.
Happy cooking....