Showing posts with label tiffin ideas. Show all posts

16 May 2016

MIX VEGGIES STUFFED NO YEAST INSTANT KULCHA

Hello everyone

Who don't like kulchas, whether stuffed or plain , these are one of the favorite breakfast in North Indian houses. But it is a bit different from regular parathas as it's more softer and fluffier than those. That's why kids prefer it over parathas.Though my younger one is very picky eater so to feed him different veggies I have to exercise my mind ,a lot. This time I thought to make these kulchas with lots of veggies as stuffing and viola it was a hit, as my lil pie finished his lunch box. You can prepare it with any filling of your choice and even plain too. Generally kulchas are made with yeast but here I made instant version without yeast, that can be prepared in jiffy too. As in the morning we don't have enough time for proofing of yeast dough so this will be a savior for you and equally yummy and fluffy too. 
Recipe is given below , hope you all will love to try it. 

MIX VEGGIES STUFFED NO YEAST INSTANT KULCHA


Serves: 4-5
Time: 30-35 mins

Ingredients 

For dough:

2 1/2 cup all purpose flour/ chapatti flour
1 cup thick yogurt ( curd)
1/2 tsp baking soda
1/4 tsp salt
1 tbsp oil

For stuffing:

2-3 medium potatoes, boiled and mashed
1-2 medium carrots, grated or very finely chopped
3/4 cup mixed colored capsicum, very finely chopped
3/4 cup beans, very finely chopped
1/2 cup green peas, crushed lightly
1/2 cup sweet corns , crushed lightly
3/4 cup cottage cheese( paneer), crumbled 
2 medium onions, finely chopped
2-3 green chilies, finely chopped
1/2 tsp ginger garlic paste
1/4 tsp cumin powder
1/4 tsp garam masala powder
1/4 tsp black pepper powder
1/4+ tsp chaat masala powder
1/4 tsp mustard seeds
2 tbsp green coriander leaves, finely chopped 
Salt to taste
Oil

Butter/ ghee for cooking kulcha


Method: 

For dough:

First of all mix all dough ingredients together except yogurt. Now using yogurt knead a soft dough. It may be little sticky but don't worry after resting it will become easy to handle. If needed use little water to get nice soft dough. Don't knead too much just 2-3 minute of kneading is enough . Now cover it and keep it to rest for atleast 10 mins.

For stuffing:

Heat little oil in a wok ,add mustard seeds and let it crackle. Now add chopped onions and green chilies. Fry till transparent then add ginger garlic paste and saute for 2 mins. Now add carrots, capsicum, beans, corns and peas with little salt. Now saute for 3-4 mins and then cover to cook for 4-5 mins. Now add all dry spice powders except chaat masala and saute for 4-5 mins or till you get all spices nicely cooked. Now add mashed potatoes and saute for 2-3 mins. Add crumbled paneer, coriander leaves, chaat masala and adjust salt. Saute for 2 mins and your filling is ready. Let it cool a little . Best to prepare filling prior and keep in fridge before using. 

For kulcha:

Take a big lemon size of dough and flatten it a little using your fingers. Now place 2 tbsp of filling in it and seal it like we do while making parathas. Now roll it in nice thick round shape using rolling pin. Now  apply some water on one side of it and place on a preheated tawa with water damped side facing down. It will stick to tawa nicely. 


Now cook it on medium flame till you see it's upper side getting nice dry and bubbles on it. 

Now flip it and apply some butter or ghee all over it as we do with paratha. 

Cook till it get nice golden patches on it. Keep flipping in between to get both sides cooked evenly. 


Similarly make all kulchas. 


Your soft, fluffy and delicious kulchas are ready to serve with any chutney or side dish of your choice. 

You can serve it for breakfast, dinner or even in lunch box too. 


You can also prepare it plain and serve with any side dish of your choice. 


*Stuffing can also be done according to your choice and availability.

* You can also add cabbage, cauliflower, spinach etc.

* Adjust spices as per your taste buds.


This is so yummy to resist. Hope you and your family will definitely love this delicious treat , so make it and do share your experience with me too. 


Please pour your valuable comments and suggestions here, they meant a lot.

Happy cooking....

4 May 2016

SOYA CHUNKS AND PANEER VEG KABAB

Hello everyone

Till now you all might be come to know that I am a pity mother of lil fussy eater ๐Ÿ˜ƒ. Few days back while watching his favorite movie he ate some chicken kabab, of course not home made. And luckily he liked it too much. Even after returning to home he used to say that he will love to hog on these snacks again. Although I am not pure vegetarian but have very limited access to these dishes in my kitchen. But as he is interested in it , which occurs once in a blue moon, I thought to do little experiment with my veg options. And viola , the experiment was a big successful one. Not only him but we all enjoyed every bite of it. Used capsicum, beans, carrots, soya chunks, potato and cottage cheese to make these beauties. These are pan fried in very less oil , which makes it suitable snacks for weight watchers too. But i am so happy that my lil one loved it and He took these in his tiffin too.
Recipe is given below, hope to make you happy with its superb taste.

SOYA CHUNKS AND PANEER VEG KABAB


Serves: 5-6
Time: 30 mins( leaving the chilling time)

Ingredients 

 2- 2 1/2 cup very finely chopped mixed veggies ( beans , carrots, colored capsicum) , I used chopper to chop the veggies
3/4 cup soya chunks 
1 cup cottage cheese ( paneer), crumbled 
3-4 medium size potatoes, boiled and mashed
2 big onions, finely chopped
3-4 green chilies, finely chopped
1/4 cup green coriander leaves, finely chopped
1 tsp ginger garlic paste
1/2 tsp black pepper powder
1/2 tsp cumin powder
1/4 tsp turmeric powder 
1/4 tsp garam masala powder
1/2-1 tsp chaat masala powder
1/4 cup bread crumbs ( optional)
Salt to taste
Oil

Method: 

First of all soak soya chunks in hot water for 15-20 mins or microwave it in sufficient water for 4-5 mints. Now wash it with tap water 2-3 times, followed by squeezing every time. Now blend it in chopper or mixer to get fine granules. Keep aside for later use.

Heat some oil in a wok, add chopped onions and chilies. Let them fry till golden, now add ginger garlic paste and saute for 2 mins. 

Now add chopped mixed veggies and some salt, saute for 4-5 mins. Add all dry spice powder except chaat masala . Saute for 2-3 mins and cover to cook the veggies till tender. 

Now add soya granules and again saute for 4-5 mins. Add mashed potatoes and again saute for 2-3 minutes. Now add crumbled paneer, chaat masala and adjust salt. 

Finally add coriander leaves and mix well. Switch off the flame and your mixture for Kabab is ready. Let it chill in fridge for 1 hr. If you feel your mixture is not too firm to make clean shapes then add bread crumb to it and mix well. Adding bread crumbs is completely optional.


Now make desired shape of kabab from mixture . 


shallow fry on a non stick tawa till nice golden on both sides. 


Your nice tender and delicious kabab is ready to be served with any chutney or sauce. 


*You can use any veggies of your choice, I used whatever was available.

*You can adjust spices as per your taste.


*You can prepare its mixture prior and keep in fridge. Just prepare kabab when have guests at home or can make it for kids tiffin . 


These are not only delicious but healthy too, as full of protein and fibers . Enjoy your day with yummy and healthy snacks.


Hope you all will love this easy cum healthy delicious recipe. Please pour your valuable comments and suggestions here, they meant a lot.

Happy cooking....


3 May 2016

DESIGNER VEGGIE RAWA MINI IDLIS

Hello everyone

Every mom have tension of what to give in her kids tiffin so that they will finish without nakhre. And the problem worsen when your kid is a fussy eater like mine. My daughter used to finish her tiffin most of the time but my lil one always have excuses for leaving his snacks. So I always have to try new things for him, which can attract him to eat. Today I made rawa idli with lots of veggies in it but in different attractive shapes. I have many silicon molds, that came as a savior for me. This dish is not unknown to maximum of you but still sharing mine version to help those moms, who are looking for interesting , healthy and quick tiffin ideas for their fussy eaters.
Recipe is given below , hope you all will try it.

DESIGNER VEGGIE RAWA MINI IDLIS


Serves: 3-4
Time: 20 mins( leaving resting time)

Ingredients 

1 cup semolina ( rawa or sooji)
1/2 cup yogurt ( curd)
Water as per need
1/4 tsp salt
1/2 cup finely chopped veggies (grated carrots, capsicum, spring onion)
1 green chili, finely chopped ( optional)
1 tbsp green coriander leaves, finely chopped
Baking soda or eno

Method:

First of all mix semolina, yogurt, salt and required water to make a lump less idli batter. Let it rest for 1 hr or overnight at any cool place , if planning to prepare early morning.

* But never keep in refrigerator other wise semolina will not absorb liquid.

* for quick result use hot water to make batter and let it sit for 1/2 an hour.

If after soaking,you find your batter thicker than regular idli batter then add little water at a time and correct the consistency. Now add all veggies, coriander leaves and chilies. Mix well, your batter is ready to be used. 

Now separate required batter in another bowl, which can be used to fill your mold at a time. Now add two pinches of baking soda or half tea spoon eno powder to separated batter. Give a quick stir you will see nice frothy batter , don't over mix the batter otherwise all the air bubbles formed ,will vanish and result in hard idli. 

Now fill the mold immediately with required batter and either steam as regular idli for 8-10 minutes or microwave for 3- 4 minutes, depend on size of mold and microwave power. Let it rest for 2-3 minutes then demold. Similarly make all the idlis and serve with coconut chutney or any sauce of your choice.


Kids like this idli very much, and in this way you can feed them some veggies also. 

*  You can add any veggies of your choice.

* After adding soda or eno , use the batter immediately. That's why add soda or eno in batches of batter, when needed.


* For more soft idlis, use eno instead of baking soda. But baking soda also works well.

* If you are making idlis in microwave then keep a bowl with some water along with the idli mold, to get nice moist idlis.


* While using microwave, keep an eye on it as over doing may result in dry and hard idlis. Mine took maximum 3 minutes.

If you don't have silicon mold just use your regular mold and prepare these healthy and delicious tiffin snacks for your kids. 


Hope you all will like this easy , quick and kids friendly recipe and will definitely give it a try. Please pour your valuable comments and suggestions here, they meant a lot.

Happy cooking...


14 Apr 2016

THREE BREADS FROM SAME PAV DOUGH ( NUTELLA FLOWER BREAD, ZATAAR BREAD, BUNNY BUNS)

Hello everyone

After baking perfect pav for my pav bhaji, I thought why not to give it some artistic twist and bake some more flavours and designs of bread from this perfect dough. I saw some patterned bread pictures few days back, on Internet . Keeping that in my mind , I tried to make these three types of breads, which are loved by everyone in both taste and look. So here is the technique and tips with step wise pics for baking these cuties. Hope you all will definitely give it a try and come up with your feedback too.

THREE TYPES OF BREADS FROM SAME PAV DOUGH


Serves: 3-4 ( each bread)
Time: 1 hr ( leaving proofing and resting time)

Ingredients

Pav dough 

Milk to brush


NUTELLA FLOWER BREAD:


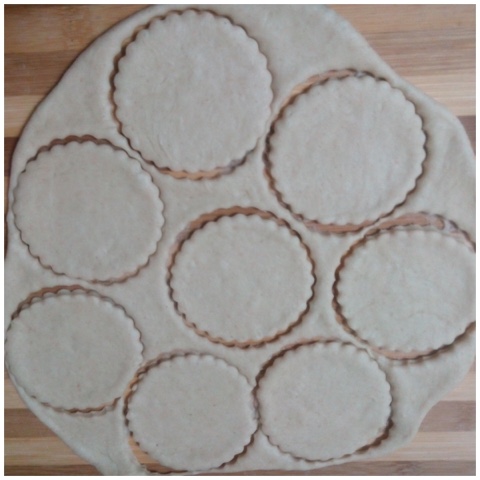
First of all cut orange size dough from well risen and again well kneaded dough. Roll a little thick chapatti from it and cut rounds from it using cookie cutter or any sharp edge glass or bowl. 


Now take one round and spread some Nutella on it as shown in pic. Now half fold it and again fold to quarter as shown in pic. Now seal its edges from one end only , as in pic .


 Now place it on a round baking dish lined with parchment paper or greased well. Similarly make all the petal shapes with Nutella and arrange as shown in pic. 


Now cover it and place at some warm place for 30-40 mins. Till then it will rise again and fill the gaps between different petals. Now brush it with some milk and bake at 200 degree C in a preheated oven for 15 mins. 


If it does not get nice golden in colour in 15 minutes then increase the oven temperature to 230 degree C and bake it further for 3-5 mins or till it get nice golden in colour. Take it out and let it cool on a wire rack.


 Your super delicious as well as eye candy is ready to serve. 


You can prepare this for any b'day party or in evening snacks or for kids tiffin too, they will love to relish on these beautiful chocolate filled breads.


ZATAAR BREAD:


Divide the remaining dough in two equal parts. Now take one dough and roll it to a rectangular little thick chapatti of your baking tray length . Spread Zataar mix on it evenly as shown in pic. Now roll it to a tight log shape. 


Now place it with sealed side down , in the baking tray lined with parchment paper or greased well. Cut the dough in 1/2 -1 cm thin slices as shown in pic. Now arrange the alternate slices as shown in pic. 


Now cover it and let it rest for 30-40 mins at a warm place. Now brush it with milk and bake at 200degree C for 15 mins. 


To make it more golden increase the temperature to 230degreeC and bake further for 2-3 mins or till get desired colour. Now let it out and cool on a wire rack.


 Your savory yummy bread is ready to be served with a cup of tea or coffee. 


Kids will also enjoy it with some sauce . You can prepare it for your kitty party or for tiffin snacks too.


BUNNY CUM PIGGY BUNS:


Divide the rest of dough in small lemon size pieces and give them oval shape using your palm. Now place then as some distance , on baking tray lined with parchment paper or greased well. 

**Always keep some distance between each buns as they will expand twice , otherwise they will stick to each other will rising or baking and ruin their shape. As some of mine got stuck to each other.

Now cover it and let it rest for 20 mins. Now make ears of it using kitchen scissors and eyes by skewer or tooth pic as shown in pic. Now again let it rest for 5 mins. Then brush it with milk and bake it at 200 degreeC for 15 mins.


 To get more golden colour again increase temperature to 230 degreeC and bake for 2-3 mins. Now let it cool on a wire rack and your cutie bunny or piggy , whatever comes out๐Ÿ˜ƒ๐Ÿ˜ƒ is ready to be served to your kids.


 You can also make these buns, stuffed with Nutella, potato filling, paneer filling or any filling of your choice. I made then plain as it was my first trial but will soon share its stuffed version too. Till then serve it with bhaji, Nutella, sauce or as it is. My younger one loves plain buns more. 


**** Never divide bread dough by stretching,other wise the gluten formed during kneading will damage, just use knife to cut dough in pieces.


So bake these cuties and please your kids and family with your creativity. I tried to explain all the tips and tricks but if any thing left then please let me know by dropping down your queries and suggestions in comment box below. Your comments and suggestions meant a lot.

Happy cooking....

16 Mar 2016

VEG VERMICELLI PULAO

Hello everyone 
As mother ,of every school going kids, I too have tension of what to give in tiffin daily. My kids are too fussy eater so I have to do extra mental work in planning menu for their tiffin. The thing ,one kid is loving is just hell to other ๐Ÿ˜ฐ. But this is the dish both are loving ☺️ and I am feeling relaxed. 
 It's good option to replace Maggi as kids generally demand maggi for tiffin but we hesitate to give . My younger one calls it maggi and feels so happy that mamma is not denying at all๐Ÿ˜. It's so easy and quick yet yummy recipe for kids lunch box and for elders too. It's light yet flavourful breakfast which everyone loves to relish on. I used to prepare it very often.
Recipe is given below, Hope you will like and try for sure. 


VEG VERMICELLI PULAO


Serves: 2-3
Time: 20-25 mins

Ingredients 

1 cup vermicelli 
1 carrot , grated
3/4 cup mixed veg ( beans, capsicum, corn, peas etc, as per availability)
2 green chilli, slitted 
1/2 tsp ginger garlic paste
1 big onion, thinly sliced 
1/2 tsp mustard seeds
1/2 tsp cumin seeds
1 pinch asafetida (heeng)
1/4 tsp turmeric powder 
1/4 tsp black pepper powder
1 tsp lime juice ( optional)
Salt to taste
oil
1 Handful roasted peanuts or any crunchy namkeen mixture (optional)


Method:

Boil nearly 4-5 cups of water in a deep pot then add 1/2 tsp oil some salt and vermicelli to it and boil for 2-3 mins. Strain it in a sieve and wash with normal water to avoid further cooking and becoming soggy. Heat oil in a nonstick wok, add heeng followed by mustard seeds and cumin seeds. Let it crackle then add chilli and onion. Fry till onion become transparent , then add ginger garlic paste and saute for a minute. Now add mix veggies and carrots, turmeric powder , black pepper powder and little salt. Saute for 5-6 mins and cover the lid in between to cook veggies properly . Then add strained vermicelli and mix well. Saute for 2 more mins , adjust salt and add lime juice, mix well and done. 


If you like little crunch then add some roasted peanuts or some crunchy namkeen mixture on top while serving . I like lots of crunch in my plate so must add these.


Never boil vermicelli for long other wise it will get soggy and will ruin your dish. As soon as you see it's getting transparent just strain and wash with normal water to avoid over cooking.
Also do boiling of vermicelli and cooking your veggies, side by side to avoid sticky vermicelli. 
Number of chilies can be increased or decreased as per taste, I kept it mildly hot for kids.
You can add any veggies of your choice to make it more yummy to your taste buds.


Your easy peasy breakfast cum tiffin snacks is ready to serve ....just enjoy it with a cup of tea.
Hope you will like and try it. Please let me know your feedback about this recipe by pouring your valuable comments and suggestions.

Happy cooking....


14 Mar 2016

MIXED HERB BEETROOT OATS SAVORY BREAD

Hello everyone

Bread is a thing which connects us to everyone in this world. Wherever you go, you can find bread in different shapes, sizes, flavours, textures etc but the main thing is it's bread. Today I too have a simple bread recipe to share. It's too simple too prepare but with healthy touch of oats and beetroot. It's a must try for health conscious bakers who love to bake for them and their family, healthy stuffs. It's a perfect snacks for tea time or for kids tiffin. So give it a try at least once, you will definitely love it.
Stepwise recipe is given below , hope you all will must try this..

MIXED HERB BEETROOT OATS SAVORY BREAD 


Serves: 4-5
Time: 3:30 hrs 

Ingredients

3 1/2 cup all purpose flour/ whole wheat or chapatti flour( I used chapatti flour)
1/2 cup rolled oats 
3/4 cup grated beetroot 
1/3 cup thick yogurt ( curd), beaten
1/8 tsp baking soda 
1 tsp dry active yeast ( I used little less)
1/2 cup Luke warm water
2 tbsp sugar 
1 tsp salt 
1/4 tsp oregano
1/4 tsp thyme
1/4 tsp rosemary 
1/4 tsp chili flakes 
Oil to grease loaf pan and dough
1/2 cup warm water to knead dough


Method:

First of all add yeast in 1/2 cup Luke warm water and 1 tbsp sugar, mix them lightly and leave for 5-10 min or till it become nice frothy.


Combine all dry herbs, salt,oats, remaining sugar and baking soda in flour and mix well.


 Now mix all dry and wet ingredients together , knead for 5 mins and let it rest for 7-8 mins. Again knead for another 2-3 mins to get nice soft dough. This may be little sticky due to beetroot and no oil. But don't worry, your dough is reedy This resting and kneading process is important to produce gluten in dough , so don't skip it.


Knead the dough by pulling and stretching it instead of applying too much pressure on your dough.

Grease the dough with oil and keep it covered at warm place to rise, at least 1- 2 hr or till it doubles in volume, depend on weather. 


When it become double in volume then punch the dough and again knead for 4-5 mins .


Now flatten it on a plain surface dusted with dry flour and by rolling give it shape of a loaf and seal its edges by pinching. 


Now place it in a greased and dusted loaf pan and brush some oil on it.


Again keep it covered at a warm place for second rise, for at least 45 mins to 1 hr or until your dough again rise to double.Now brush its top with milk.


Now bake it in a preheated oven at 190 degree C for 35 -40 mins or till its top become nice brown and on tapping you can hear hollow sound. 
If you see your loaf is browning very fast then cover it loosely with an aluminum foil.


Now brush it with some butter and let it cool completely on a wire rack before slicing, to get nice clean slices.


Your bread is ready to be served with a cup of tea, enjoy these easy yet delicious bread slices. You can also give it in your kids tiffin , either apply butter on it or make sandwiches. In every way these will win your heart.


As I didn't use any oil in this bread so it is little chewy yet soft and porous. This chewiness adds to its flavor but if you want crumbly texture then can add 2 tbsp oil to your dough.

You can use any herbs too and also any other loaf pan to get your desirable shape and flavour. But then baking time may change so after 30 mins keep an eye on it. Mine took exactly 40 mins๐Ÿ˜Š.
While kneading If you find your dough is too sticky to handle then can sprinkle some flour on it , 1 tbsp at a time ,but the quantity given will be sufficient for a soft dough. Adding too much flour can result in dense bread. After kneading it well for 7-8 mins, it will become easy to handle it self.


So enjoy these baked delicacies and pour your valuable comments and suggestions here, they meant a lot.

Happy cooking....